5 DIY Simple Space Saving Ideas (with Instructions)

5 Cool DIY Kitchen Projects (with Instructions)
October 22, 2018
5 Cool DIY Weekend Projects (with Instructions)
October 26, 20185 DIY Simple Space Saving Ideas (with Instructions)
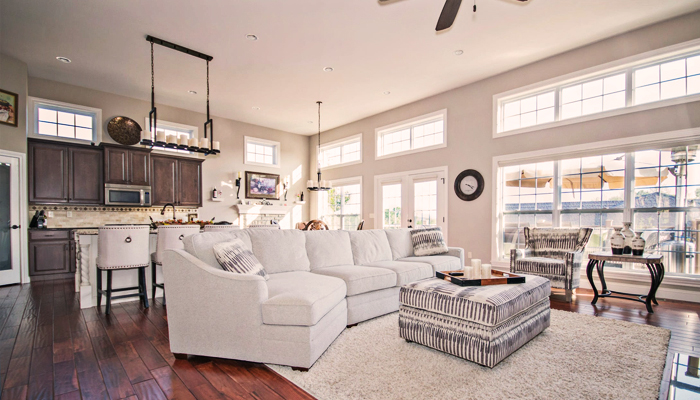
Welcome! Let’s look together over five DIY space saving ideas for every single room of the house. The goal? To help you organize your belongings more efficiently. The projects are ranked by difficulty level, starting with beginner-friendly tasks and finishing with those most suited for experts of handmade crafts. They contain extensive material lists, as well as step by step indications.
#1
DIY Bulletin Board
Category: DIY bulletin board
Location: in the office
Time Estimate: under 15 minutes
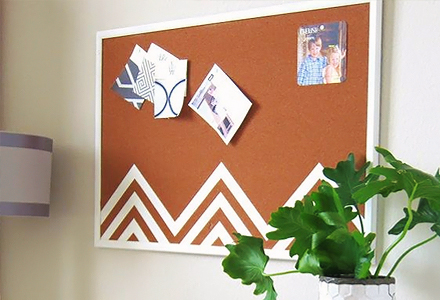
Learning how to make a notice board is simple enough, and it has many advantages. The main appeal behind it lies in the fact that you can organize your daily schedule and tasks in a visually available place. Nevertheless, you can pin other essentials to it, such as the house or car keys and bills to pay. In this way, you will never misplace them ever again.
List of Materials
Steps to Take in Making a DIY Bulletin Board
1 Choose a cardboard piece of the desired dimension.
2 Lie the piece of fabric face down and put the cardboard on top.
3 Measure and cut the excess cloth off. Leave an extra inch on each side for securing.
4 Tape the fabric to the back of the cardboard.
4 Pin important documents, notices, or items to it.
2 Lie the piece of fabric face down and put the cardboard on top.
3 Measure and cut the excess cloth off. Leave an extra inch on each side for securing.
4 Tape the fabric to the back of the cardboard.
4 Pin important documents, notices, or items to it.
#2
Closet Organizer DIY
Category: DIY closet organizer
Location: any closet in the house
Time Estimate: under two hours

Organizing the closet is one of the most resourceful DIY space saving ideas to put into action in your home. In just under two short hours, you can upgrade the potential of any wardrobe, turning it from a storage space with one fixed purpose to a multifunctional piece of furniture.
List of Materials
Steps to Take in Making a DIY Closet Organizer
1 Sliding shelves, drawers, or hangers come with a set of members that activate the rollout mechanism. Install the corresponding one on each component.
2 Screw in the other member on the inside of the closet.
3 Put your shelves, drawers, or hangers into place, then test if the mechanism is functioning properly. Make the necessary adjustments with a screwdriver.
2 Screw in the other member on the inside of the closet.
3 Put your shelves, drawers, or hangers into place, then test if the mechanism is functioning properly. Make the necessary adjustments with a screwdriver.
#3
Cabinet Rollouts DIY
Category: DIY cabinet rollouts
Location: cabinets in the bathroom and kitchen
Time Estimate: under two hours
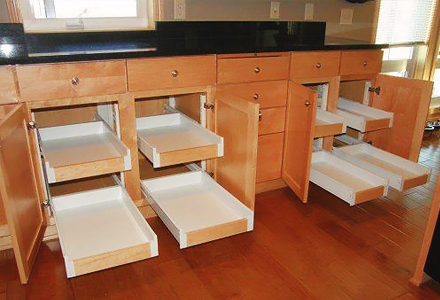
Why not make the most out of the cabinet space available in the kitchen or bathroom by installing rollouts? In this way, you will put them to better use and access your cutlery, cookware, beauty products, or cleaning surprise with much greater ease.
List of Materials
Steps to Take in Making DIY Cabinet Rollouts
1 Attach the U-brackets to the sliders using the screws provided.
2 Take the cabinet door out.
3 Place the frame inside the cabinet, and make sure you can still close the door.
4 Secure the frame to the cabinet on the side opposite to the hinge.
5 Slide the racks into place.
6 Attach the cabinet door back onto the structure.
2 Take the cabinet door out.
3 Place the frame inside the cabinet, and make sure you can still close the door.
4 Secure the frame to the cabinet on the side opposite to the hinge.
5 Slide the racks into place.
6 Attach the cabinet door back onto the structure.
#4
Hang Your Lights DIY
Category: DIY hanging lights
Location: any room of the house
Time Estimate: half a day
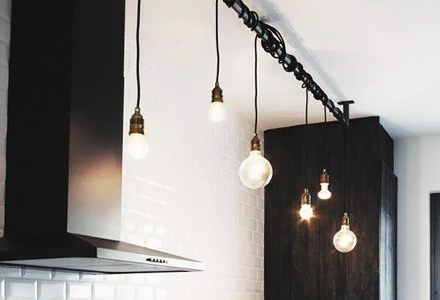
The hanging lights project is one of the more unconventional DIY space saving ideas, as its storage utility isn’t obvious at first glance. The trick behind it is actually a relatively uncomplicated one. Instead of having to illuminate your rooms with additional nightstand lamps or other fixtures that cause clutter, hang as many light bulbs as you want to create the bright space you deserve.
List of Materials
Steps to Take in Making DIY Hanging Lights
1 Purchase your pendant light, or make your own using mason jars, baskets, or even old wooden salad bowls for the project.
2 Take out your old lights and uncover the electrical wiring. You should see a tube there as well. Make sure everything is turned off first to avoid any accidents.
3 Install the wire of the light fixture through the tube, then adjust the wiring of the new lamp to the old framework in the ceiling using wire cutters and electrical tape where necessary.
4 Test your hanging fixture. Is it working? If it’s not, go back and make some adjustments.
5 Secure it to the ceiling by screwing the cover back in.
#5
DIY Corner Shelves
Category: easy DIY corner shelves
Location: any room of the house
Time Estimate: under three hours
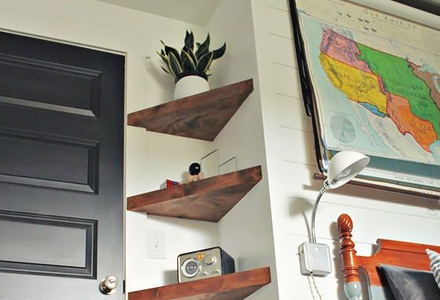
Are the walls in your room already covered in floating shelves, and you still need additional storage space for your belongings? Shelves can also be installed in the corner. The process is a bit more complicated, but it will be worth the effort.
List of Materials
Steps to Take in Making DIY Corner Shelves
1 Measure each side of your wall to determine how large you want your shelves to be.
2 Cut the pieces of wood to the right size with the table saw and miter saw.
3 Take the plywood board straight to the miter saw and cut to size as well.
4 Drill the pieces together to form one corner piece of the shelf, then repeat for the other.
5 Sand the pieces down until they are smooth.
5 Apply a generous coating of paint in your desired color.
5 Let everything dry overnight, the seal the paint.
5 Secure in the wall using long screws.
Gathering Everything Up, Letting Our Creativity Loose
If we were to choose one favorite project on the list of DIY space saving ideas presented above, it would have to be the closet organizer. Nothing quite compares to the enhanced utility of a repurposed wardrobe. What task are you looking forward to starting work on in your own home? Let us know, and enjoy the crafting process!

